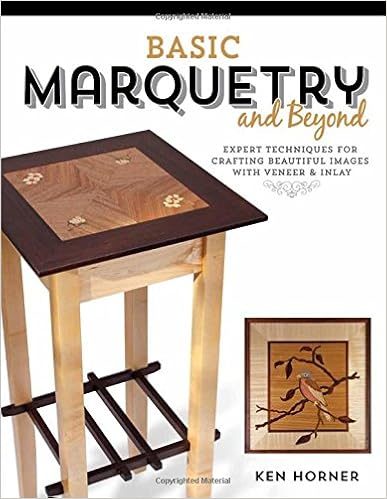
By Pierre Ramond
ISBN-10: 0892366850
ISBN-13: 9780892366859
Книга Marquetry MarquetryКниги English литература Автор: Pierre Ramond Год издания: 2003 Формат: pdf Страниц: 218 Размер: 55.7 MB ISBN: 0892366850 Язык: Русский0 (голосов: zero) Оценка:For centuries the paintings of marquetry has been headquartered in Paris, the place the culture has been transmitted simply inside workshops focused within the Faubourg Saint-Antoine. the skin international, as a result, has had very restricted wisdom of the recommendations utilized by the masters of this paintings. The booklet of this English-language variation of l. a. Marquetrie supplies amateurs, paintings historians, artistic woodworkers, and conservators entry to a useful physique of information of the innovations of marquetry, masking the heritage of the craft in addition to causes of the way a marqueter's studio is prepared and the fabrics, tools, drawing, training, and approaches utilized in the craft. It combines a radical rationalization of the craft ideas with distinctive research of interval examples, thereby giving readers a greater realizing of marquetry items and new insights into store practices. The publication is a useful source either for the artwork historian and the training craftsperson.
Read Online or Download Marquetry PDF
Similar woodworking books

Portable Power Tools (Art of Woodworking)
The artwork of Woodworking - moveable energy instruments
Книга Marquetry MarquetryКниги English литература Автор: Pierre Ramond Год издания: 2003 Формат: pdf Страниц: 218 Размер: fifty five. 7 MB ISBN: 0892366850 Язык: Русский0 (голосов: zero) Оценка:For centuries the paintings of marquetry has been based in Paris, the place the culture has been transmitted merely inside workshops centred within the Faubourg Saint-Antoine.
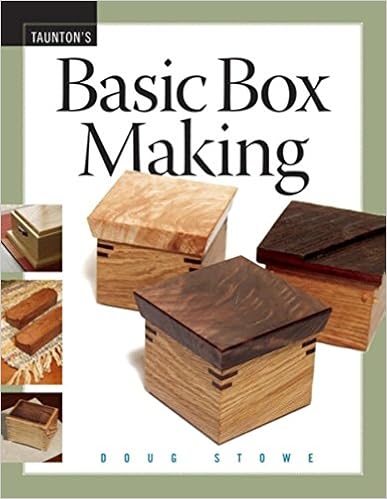
Field making is ideal for starting woodworkers drawn to gaining abilities, experimenting with layout, and feeling delight at a undertaking that may be accomplished with no the time and cost dedication of a larger venture. This e-book will provide uncomplicated designs, in addition to many adaptations to educate various woodworking strategies whereas the reader creates a realistic merchandise or a present that may turn into an heirloom.

Think the wonderful thing about a deer operating in the course of the wooded area, a buffalo status on a prairie at sundown, or a mallard drake winging throughout the cattails-all stunningly carved in wooden below inches thick. this is often the paintings of natural world aid carving, the place based photos of animals and birds are dropped at lifestyles with carving concepts which are effortless to grasp and appropriate to any form of woodcarving you opt to do.
- Making Garden Furniture from Wood
- Woodworking
- Step-By-Step Cabinets and Shelves
- Wood Finishing (Art of Woodworking)
Extra resources for Marquetry
Example text
Put a bit of glue on the ends of the tray front and slip into position at the bottom/front of the assembly, then clamp in place (PHOTO 7). Then reinforce with a couple of brads or finishing nails. Finally, attach the feeder bottom with countersunk 1⅝" screws and your work on the main portion of the feeder is done (PHOTO 8). To cover and protect the feed and still have easy access PHOTO 1 When crosscutting large stock with a jig saw, always clamp the material to a secure work surface. PHOTO 2 Mark the feeder sides for accurate placement of the divider.
While the 8" height of the nails isn’t critical, be sure to locate the front and back nails exactly even with each other or the door will twist as it opens. When you’re satisfied with the door action, set the nails just below the surface with a nail set. Apply a bit of waterproof glue along all the top edges except the door, and nail the roof in place so that its rear bevel fits flush with the back piece. Cut a ¾" x ¾" x 2¼" piece of cedar to function as a toggle latch for the door. I’ve rounded each end of this piece with a disc sander, but it’s fine to leave them square.
The last measurement you need to make is the distance between the outside of the bottle’s neck and the body of the bottle. When laid down on its side, this measurement will determine the height of the cutout in the front collar. When all your critical measuring is done and written down, cut the project parts to overall length and width by whatever means you prefer. In PHOTO 3, I’m making a perfectly straight rip cut with a jig saw by clamping a straightedge to the workpiece to guide the cut. The feeder roof has a slight slant to it, so when cutting parts make a 5-degree bevel on the top of the front collar and the back edge of the roof.