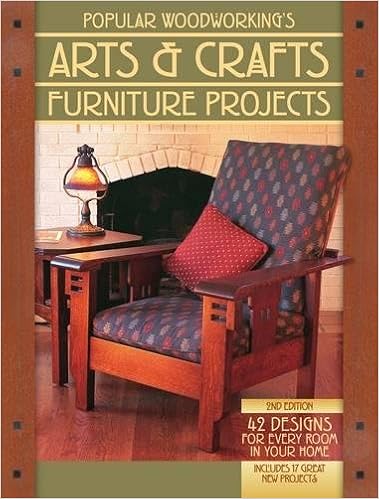
By Robert W. Lang (ed.)
ISBN-10: 1440339716
ISBN-13: 9781440339714
Read or Download Popular Woodworking's Arts & Crafts Furniture Projects: 42 Designs for Every Room in Your Home PDF
Best woodworking books

Portable Power Tools (Art of Woodworking)
The paintings of Woodworking - moveable strength instruments
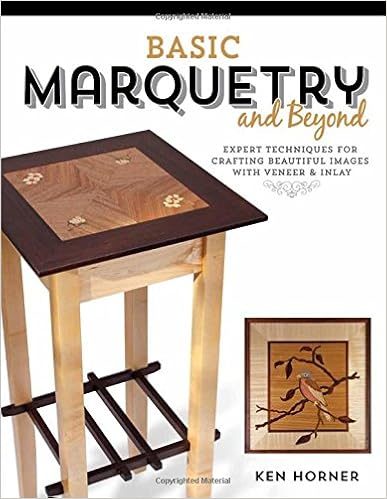
Книга Marquetry MarquetryКниги English литература Автор: Pierre Ramond Год издания: 2003 Формат: pdf Страниц: 218 Размер: fifty five. 7 MB ISBN: 0892366850 Язык: Русский0 (голосов: zero) Оценка:For centuries the paintings of marquetry has been established in Paris, the place the culture has been transmitted merely inside of workshops targeted within the Faubourg Saint-Antoine.
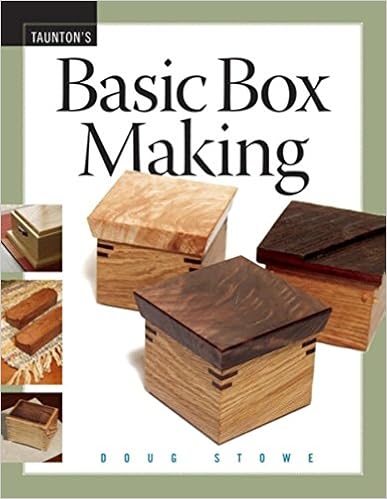
Field making is ideal for starting woodworkers drawn to gaining abilities, experimenting with layout, and feeling delight at a undertaking that may be accomplished with no the time and rate dedication of a larger undertaking. This ebook will supply easy designs, in addition to many adaptations to educate various woodworking options whereas the reader creates a realistic merchandise or a present that might develop into an heirloom.

Think the wonderful thing about a deer operating during the wooded area, a buffalo status on a prairie at sundown, or a mallard drake winging in the course of the cattails-all stunningly carved in wooden under inches thick. this can be the paintings of natural world reduction carving, the place based pics of animals and birds are dropped at existence with carving concepts which are effortless to grasp and acceptable to any kind of woodcarving you opt to do.
- Woodworking Basics Mastering the Essentials of Craftsmanship
- 3D Scroll Saw Patterns Techniques
- Wood Magazine, Issue 224 (March 2014)
- Quick & Easy Jigs and Fixtures (Popular Woodworking)
Extra resources for Popular Woodworking's Arts & Crafts Furniture Projects: 42 Designs for Every Room in Your Home
Sample text
Mark that size on the template and use a drill and jigsaw to make a square hole. Clamp the template in place over the mortise locations and cut your through-mortises using two or three depth settings. Depending on the router bit you’re using, you may want to use a backing board behind the side to reduce tearout. I used a jigsaw and chisel to square up the corners. SHAPING UP THE SIDES The next step is to cut the sides to their “spade” shape. I used my band saw for most of this work, but used a jigsaw to cut the radii under the top shelf and the arch at the bottom.
Because this work is delicate, make sure your chisel is super sharp. Build the back before you build the doors because the back, when screwed in place, holds your case square. A square case is critical when hanging your doors. Make your back pieces out of any scrap pieces of cherry you have lying around. Narrow pieces are OK. You just want to make sure that the width of the pieces will add up to 311⁄ 4" when in place in the rabbet in the case sides. Begin by cutting 5⁄ 16"-deep × 1⁄ 4"-wide rabbets on the edges.
Now hang the doors. I used Amerock non-mortise hinges. These hinges are adjustable so you can get your inset doors lined up just right. And installing them is a snap. First, screw the hinges to the case. Then attach the doors to the hinges using spring clamps. Drill pilot holes for your screws and screw the doors to the hinges. Remove the spring clamps. While you’re at it, add the knob and the catches you’ve chosen to hold the doors shut. Remove all the hardware and then cut some 1⁄ 4" × 1⁄ 4" retaining strips to hold the glass in place.